Windows Putty Guide
NRAO Employees: Network access is for use on NRAO-approved machines only. Complete the Permission to Connect non-NRAO Computer to NRAO Network form (PDF) and have it authorized by your local computing division head before attempting any connections except "nraoPUBLIC". Please note that VPN is the preferred remote connection technology.
Visitors: May make use of NRAO public wireless networks where available. For RFI restricted areas, contact the Help Desk.
Putty Basics
PuTTY is a free program that provides much (if not all) of the functionality of the Secure Shell you are used to on Unix/Linux machines, for a Windows system. The PuTTY main page (which can also be found by "googling" for "PuTTY") is maintained by the Author, Simon Tatham, in the U.K.
Because it is free software, and has a liberal License, you can copy it to as many systems as you like. It is installed on some, but not all, Windows desktops at NRAO.
Step 1: Get Putty Programs
- If you want it for your home system, read this step.
- If you have it on your Windows system at work, skip this step.
- If you don't have it on your work Windows system, but want it, submit a helpdesk ticket.
The main components of putty will appear in the "all programs" menu. Those of interest are:
PuTTY: connect to a remote system.plink: for one-liners; analogous to thesshcommand on a Linux system.PuTTYgen: Generate/Manage ssh keys.Pageant: The ssh agent; load your keys here.<pscp: file copying, likescpon Unix.PSFTP: The secure FTP client.
If you're installing these on your home computer, at a minimum you'll want the main putty.exe file itself. If you plan on doing any file transfers, you should also get the pscp.exe and psftp.exe programs. If you write batch files and want a secure-shell-one-off command, you'll appreciate plink.exe. If you want the features Unix users take for granted such as running a secure shell agent and manipulating ssh keys, get pageant.exe and puttygen.exe.
If in doubt, get everything except the puttytel.exe program.
You can put these programs wherever you like on your disk(s), but we recommend they be kept together in a folder, e.g. C:\putty\. You can of course make shortcuts to them on your desktop if you want.
Step 2: The PuTTY Sub-Menu
This image shows the items in the PuTTY sub-menu. The PuTTY program itself (3rd item in the menu) is the one you'll use the most; it will connect you to the ssh server you want.
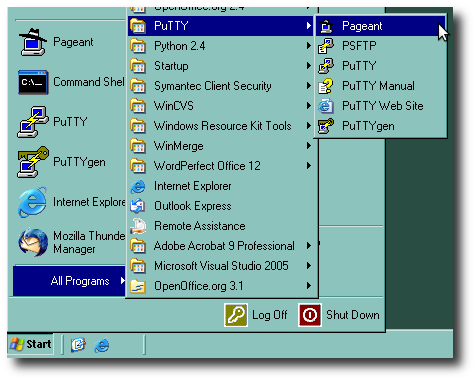
The other programs in the menu are:
- Pageant, the ssh agent, is something you usually want to run ONCE (and once only) for each time you start a Windows session (see step 4 below). It's only useful if you've generated a ssh key (see PuTTYgen below).
- PSFTP runs the Secure FTP command. This connects to a remote ssh server (not a FTP one!) but gives you a FTP-like interface, useful for copying files back/forth, if you like that paradigm.
- PuTTYgen is the equivalent of the Unix command
ssh-keygen, and is what you want use (only ONCE, maybe ever) to create your ssh key; or to create additional special purpose keys. It's also described in Step 4.
Step 3: Log in!
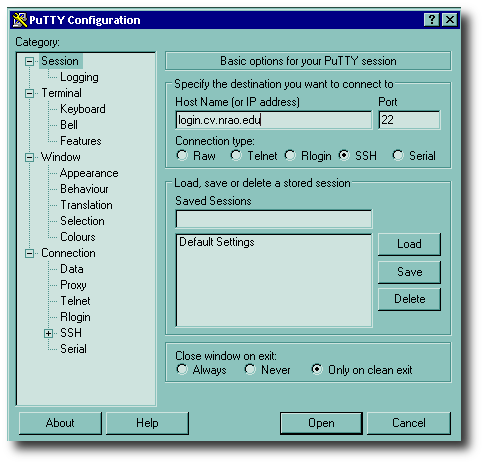
If you've made a desktop shortcut to the PuTTY program, double-click on it. If it's in your menu, go there and start it. Otherwise, use the file manager to get to where you stored the files, and double-click on putty.exe. You should see a setup screen like the one shown here.
All you do is fill in the hostname (or optionally, IP address) of the system you want, make sure SSH is checked (as shown), and press the "Open" button.
The first time you EVER connect to any given remote server, you will see a warning like this one:
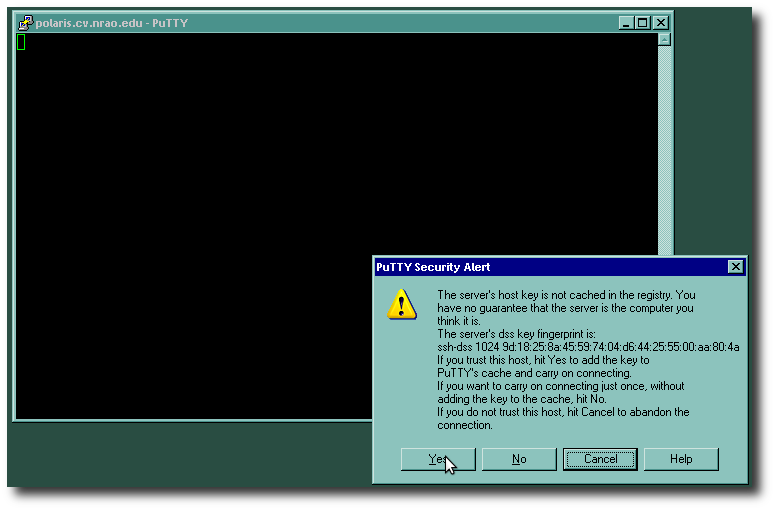
Don't panic; this is normal. If you are really paranoid, you can call up the administrator of the server and ask for verification of the "fingerprint" shown, before pressing the Yes button. PuTTY will remember this fingerprint from the server in question, for any subsequent logins, and any future sessions.
Finally, you will see a login prompt such as this one:
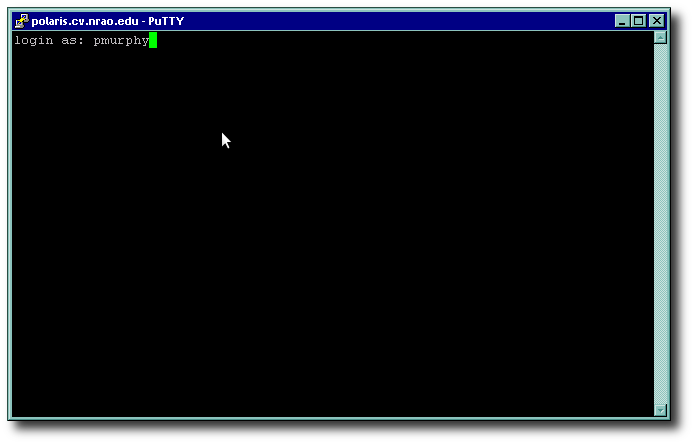
It's asking for your username (e.g. pmurphy). Enter it (yours, not "pmurphy" unless you are Pat Murphy!), and press <ENTER>. Then, unless you are using keys and the ssh agent, you will get a password prompt; this is your Unix/NIS password, not your Windows AD password. Enter it.
At this point, you should be logged in and will have a screen that looks much like the one above. Unlike SecureCRT, PuTTY emulates an X windows "xterm", and your TERM variable should be automatically set to this automatically. Most things like pine, emacs, vi, the lynx and w3m web browsers, and other character-based applications should all work correctly in this environment.
Advanced Putty Use
So you use PuTTY, it gets you in, but you want to move beyond having to enter your password each and every time you log in to the server. It's not hard to set this up: there's a one time (ever!) key generation, and then a couple of steps to take when you first log in to your Windows system, before firing up PuTTY. Read on...
Step 4: Generate Your Key
This is a one-time operation; once you have generated your key, it can be used over and over, for each ssh connection you make to a remote server.
For the best and easiest user experience, you need a pair of ssh keys: one private, one public. Use the PuTTYgen program to generate a key. We recommend choosing an RSA key as they are more secure than DSA keys.
Remember to enter a passphrase; NRAO Computing Security Policy mandates use of a passphrase so that your private key is "encrypted". Don't worry, once you have the agent running, you will only have to enter this passphrase once per Windows session; it will cover all your ssh sessions to remote Unix machines without a password/passphrase challenge, once your private key is in your agent, and your public key is on the remote server (see below).
Leave this window open; you will need the text of the public key shortly.
Now make a PuTTY connection to, say, your Unix workstation. In the author's case, that was lunasa.cv.nrao.edu. When you log in, give this Unix command:
cat >> ~/.ssh/authorized_keysGo back to the key generation window that you left open, copy the text of your public key, and paste it in the terminal window. Then press Control-d, i.e., hold the control key down and press a lowercase "D". The Unix prompt will reappear.
[Tech savvy users will, of course, be able to use their editor of choice — emacs, vi, etc. — if they prefer this over "cat".]
PuTTY will default to putting your public and private keys in your Documents folder by default. But you don't have to stick with this. The author strongly recommends moving the private key to a safe place (if you're really paranoid, put it on a USB memory stick but make a backup somewhere else, also safe).
You can also save the public key, but it doesn't have to be in the Documents folder (or anywhere else on your Windows system) for PuTTY to work. In fact, the right place for it is in a file called authorized_keys in the ~/.ssh/ directory on your remote unix servers. Once your public key is in your authorized_keys file on a server, and your key is in your agent, you will not need a password to log into that server. Except...
The three bastion serverslogin.cv.nrao.edu,login.aoc.nrao.edu, andlogin.gb.nrao.eduare special. They ignore your~/.ssh/authorized_keysfile for your account, mainly because they also accept connections from the internet (unlike a Linux desktop). See the main ssh documentation for additional details on these special hosts. If your private key is encrypted with a passphrase, you can request that a sysadmin add your public key to the system location for one or more of these bastion hosts, but you may be asked to prove the key is encrypted, and explain from where you'll be connecting.
Step 5: Start the Putty Agent
You only need to do this once per Windows session.
 From the PuTTY menu, select the
 Pageant program. It docks itself in the task bar at the bottom right of your screen, as shown in the image on the left.
Step 6: Add your Key
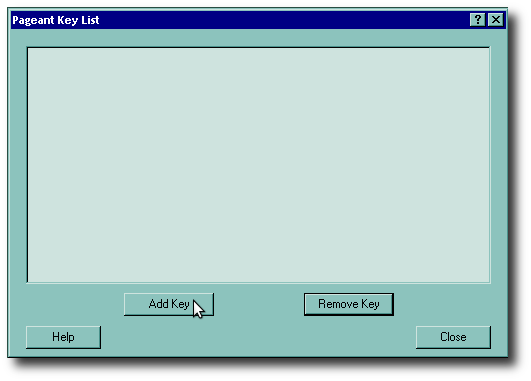
Once the agent has started, double-click on it to open it. You will see an empty list like the one on the right. Prese the Add Key button to add your key. This brings up a dialog box like the one shown below:
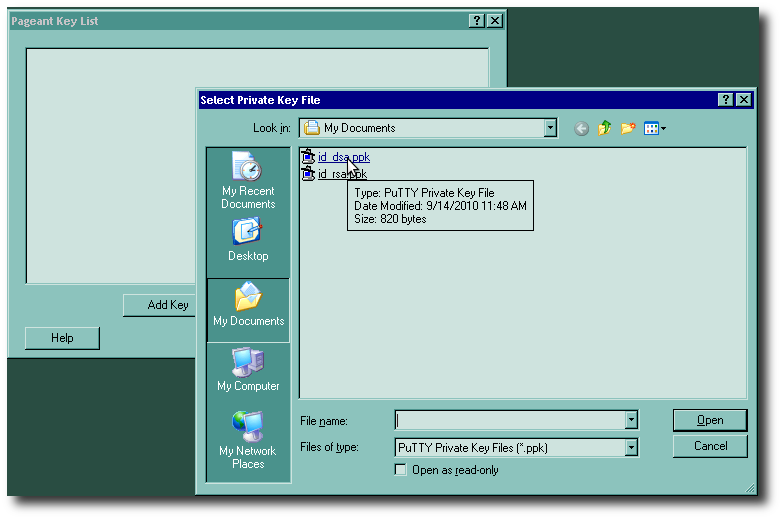
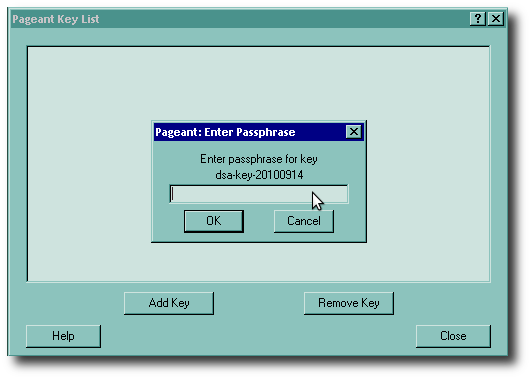 Now select your private key (you'll have to navigate to wherever you saved it, if it's not in the Documents folder) and press the Open button. Once you do that, you will be asked for the passphrase, as shown on the right. Remember, this only gets asked once per Windows session.
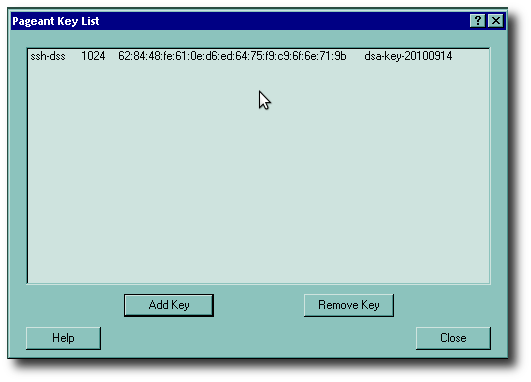 Now you can see that your key is indeed in the agent. Go ahead and press the Close button now, unless you want to add additional keys.
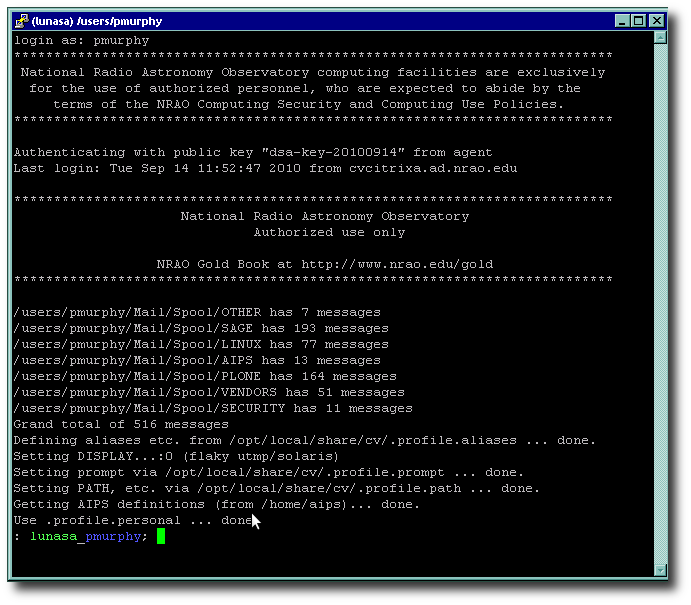
Now, with the key in your agent, when you make a PuTTY (ssh) connection to, say, your Unix workstation (or someone else's, if invited), you get the username challenge, but no password prompt; you just get logged in like this:
For a much more complete description of the technical capabilities of PuTTY, see the PuTTY Documentation page and PuTTY FAQ, both of which are very extensive and detailed. PuTTY can basically do just about anything that its OpenSSH counterpart on Linux and Unix can do: agent authentication, multiple keys and so on. See our other Computing Guide documents for the Unix documentation on these; the principle in most cases will be exactly the same.

