
Upgrading to Windows 10
Upgrading Your Computer to Windows 10:
IMPORTANT!
1) If the computer you are upgrading is a laptop, you MUST connect it to power before initiating the upgrade.
2) Back up any data you can't afford to lose. We have not encountered data loss thus far, but you don't want to be the first to lose data.
3) If the hard drive of your computer has been encrypted (especially with TrueCrypt), DO NOT attempt the update until your computer has been decrypted. Attempting this update while your hard drive is still encrypted will break Windows and will cause the loss of all your data. Windows can be reinstalled; however, all data that has not been backed up will be lost permanently.
4) This process is mostly hands off, but it takes a couple of hours. Please plan accordingly.
A balloon notification will appear as shown. Click on the balloon to go to your Software Center.
You can also access the Software Center by going to Start -> All Programs -> Microsoft System Center -> Configuration Manager -> Software Center.

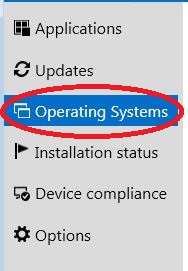
Once in the Software Center, click on the Operating Systems in the left hand menu.
This should bring up the following.

Click on Win7-To-Win10 to bring up the install page.
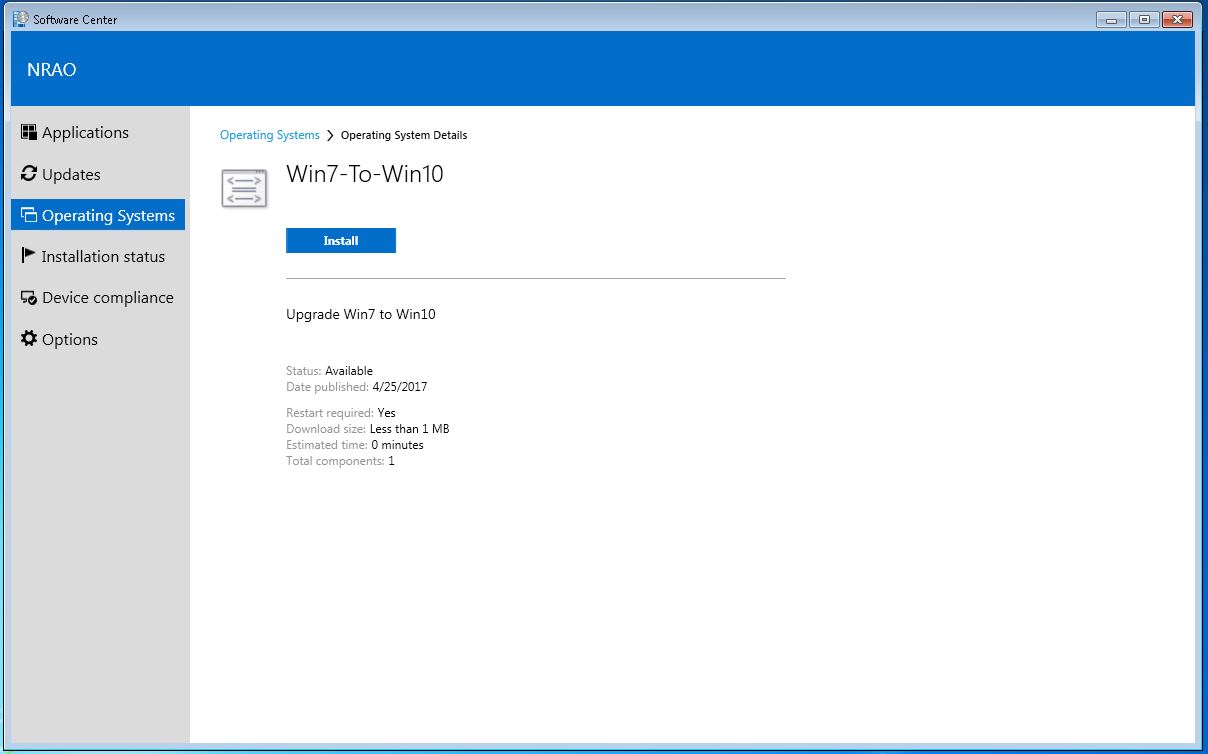
Click "Install". This will bring up a warning that you are about to upgrade the operating system on your computer. Click "Install" again to begin the process.

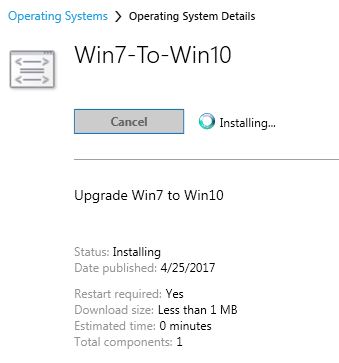
This will bring you to the main Software Center page which will show that the upgrade is installing.
You will also see this popup that shows the install is in progress.
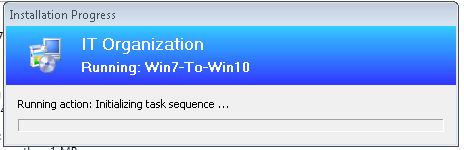
At this point you can walk away and come back to an upgraded computer in a few hours.
After Upgrading to Windows 10:
After upgrading you will need to run updates. Go to Start -> Microsoft System Center -> Software Center -> Updates and select "Install All" to ensure Windows 10 is up to date. This will require a reboot.
Because Windows 10 takes some program defaults during the upgrade, you will need to do this yourself. You will most likely need to set your default programs for
- PDF viewer (Adobe Acrobat Reader DC or Adobe Acrobat DC)
- Email client (Thunderbird or Outlook)
- Web browser (Firefox or Internet Explorer)
To configure default applications go to Control Panel -> Programs -> Set Default Programs. The list of programs will be on the left hand side.
Select the program you want. It will tell you if the program has all, or some of its defaults. You can either select "Set this program as default" (which gives it all of its defaults) or you can select "Choose defaults for this program", which makes a program default for a specific file extension, e.g., .docx for Word.

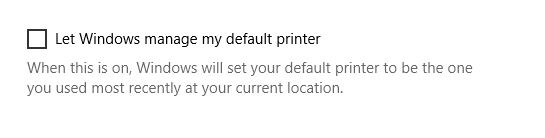
The way default printers is handled is different in Windows 10 as well. Microsoft wants to set your default printer to whatever printer you used last.
If you want to manually set your default printer rather than let Microsoft set it for you, go to Start -> Printers and Scanners. Scroll down and uncheck the box that says "Let Windows manage my default printer".
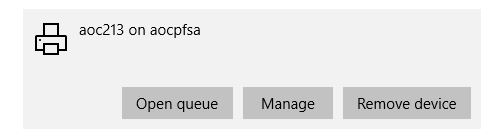
Then scroll back up to the printer you want to set as your default and select "Manage".
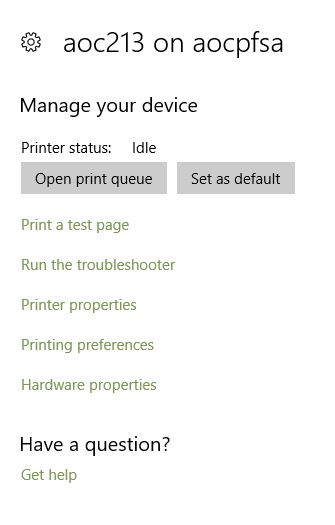
Finally, select "Set as default" to make the printer your default printer.
Reverting from Windows 10 to Windows 7
If a user is unsatisfied with their new Windows 10 platform, they have 10 days to revert back to Windows 7. This process usually takes about an hour or less and should probably be done in consultation with your Help Desk staff, as at some point all compatible AUI - managed computers must be running Windows 10.
Here is how to revert to Windows 7.
1. Open your Start Menu, and type in "Settings", and hit Enter.

2. Open "Updates and Security" .
3. Open "Recovery".

4. Under "Go back to Windows 7", click "Get Started".

5. A dialog box will pop up asking you to answer/choose the reason why you're going back to Windows 7. There is no good reason to tell Microsoft why you are reverting to Windows 7, so leave this box empty and click "Next".
6. An Updates window will pop up. Click "No, thanks".
7. Click Next twice and then click "Go back to Windows 7".
Once this process has completed, your computer will restart and your computer will now be once again running Windows 7.
